


Damper
Easy, time saving, flavour packed, one pot recipes!
I am amazed at how a few basic ingredients can make something so simple yet so yummy and is so simple to prepare. Damper can be eaten at any time of the day or night and is so versatile. There are a huge number of variations to this classic that you can use to personalize this bread, although I
will use the one that I prefer from the couple I have tried.
Ingredients:
- 2 cups of self raising flour
- 1 tablespoon of butter
- ½ teaspoon of salt
- ¾ cup of milk
Steps:
- Add salt and self raising flour to a mixing bowl and rub butter into mix to resemble fine breadcrumbs.
- Stir in the milk using a butter knife to make a soft dough.
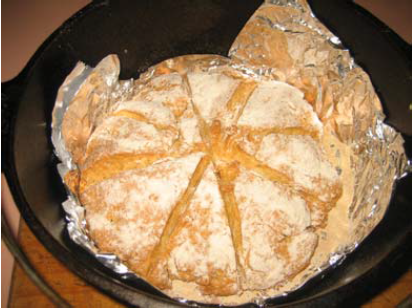
- Turn the dough out onto a floured surface, shape into a ball then flatten roughly to the size of your camp oven and score the top with a sharp knife.
- Lightly flour the base of your oven, place dough in and lightly flour top of dough.
- Cook dough using coals for roughly 30 minutes or until bread sounds hollow when you tap the top of it.
- Eat while the bread is warm with your favorite topping.
Tips:
- To protect your camp oven place aluminum foil in the base of it prior to the flour and dough. This stops the flour burning to the bottom.
- The damper will rise and taste better if the dough is a little on the wet side rather than a dry mixture.
Mick.
